Frittata

3 eggs (for a 9-inch pan)
½ T. olive oil
Round onions, thinly sliced, enough to almost cover bottom of pan
Leftover steak or hamburger, ham, bacon, sausagefrittata done

Vegetables: leftover green beans, bean sprouts, asparagus or raw spinach, tomatoes, red or green peppers
Dash of dried herb(s): basil, parsley, maybe salt and pepper, depending on the leftovers’ seasonings
Possible additions depending on what you have: roasted potatoes or cooked taro
Toppings: cheese, sour cream, mashed avocado, guacamole, salsa or other hot sauce (See notes below.)

Heat pan on medium to medium-high heat.

Lightly beat eggs and set aside.

When pan is ready, add oil and enough sliced round onions to spread across the bottom on the pan. Cook until onions lightly browned.

Add protein. If it’s a leftover then cook only long enough to heat through. For uncooked protein, cook separately and then add. If using bacon, rest on paper towels to absorb some of the grease before adding.

Add vegetables and cook until warmed through.

Add eggs and cook until edges set and the surface is still wet but not overly runny.  (I gently lift the edges of the eggs and tilt the pan to let the uncooked egg sneak underneath.  This seems to allow for more even browning when it’s under the broiler.)

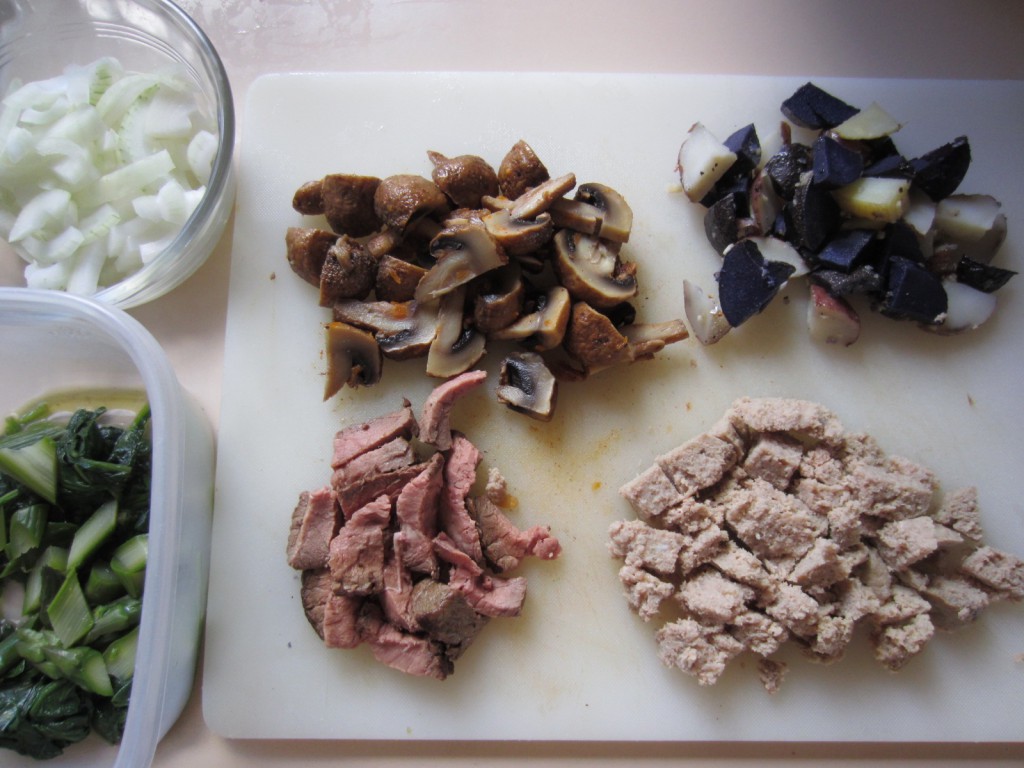
frittata ingredients

Optional: Depending on the ingredients and what I have in the fridge, I will add grated cheese before putting the frittata under the broiler.

Place pan under broiler until top is set and cheese melted, if you’ve added it.

Caveat #1: As much as my family likes this for breakfast, I make it only when I have an assortment of leftovers. In the pictures here, leftovers were a few slices of grilled New York steak, leftover turkey burger and roasted garlic potatoes (these recipes to be posted at Onolish soon), roasted mushrooms (may be sharing this one later, too), spinach, and asparagus. Because the ingredients — except for the spinach and asparagus — had been previously seasoned, I didn’t add any seasoning.  A dollop of sour cream made it even nicer.   As I said, this is a leftover dish: it is what it is depending on what’s in the refrigerator.

Caveat #2: My frittatas do have essential ingredients: onions, some sort of protein and vegetables, and, of course, eggs. Anything else, as they say, is gravy.
Chewy Toffee and Almond Oatmeal Cookies

Screen Shot 2013-04-17 at 10.36.30 PM
They are addictive!

1/2 cup (1 stick, 4 ounces) butter, softened
1/2 cup light brown sugar, packed
1 large egg
1/2 tsp vanilla extract
3/4 cup all-purpose flour
1/2 teaspoon baking soda
1/4 teaspoon table salt
1/2 teaspoon ground cinnamon (optional)
1 1/2 cups rolled oats
3/4 cup Heath Toffee Bits
1/4 cup sliced almonds

Prep Time: 20 minutes

Source: This recipe has been adapted from Smitten Kitchen Thick and Chewy Oatmeal Cookie Recipe.

In a large bowl, cream together the butter, brown sugar, egg, and vanilla until smooth. In a separate bowl, whisk the flour, baking soda, cinnamon (optional) and salt together. Add the dry ingredients gradually into the butter/sugar mixture. Stir in the oats, chocolate goodness aka toffee bits, and almonds if you are using them.

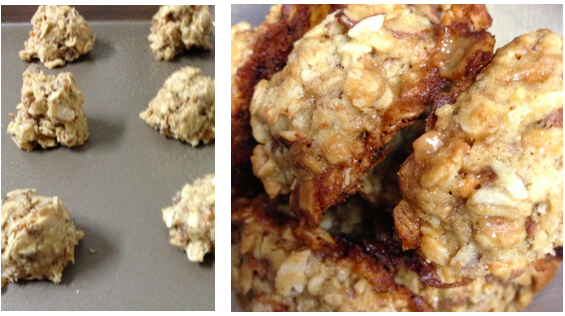
Scoop the cookies onto the cookie sheet and chill the whole tray before baking them (atleast 15 minutes). Preheat oven to 350°F

Bake them for 10 to 12 minutes. They should be golden on the edges.

More:

  • I like to scoop the cookies onto the cookie  sheet and then chill. There’s no need to chill them for a very long time.
  • I prefer these without the cinnamon.
  • I have substituted all kinds of chips, chocolate, butterscotch instead of the toffee bits. You can really do whatever you want. I am not crazy about raisins, but if you go the raisin route I would be sure to include the cinnamon. Have fun and be creative!  When you add something really sweet, add some sort of nuts too.
  • I like to use parchment paper to line my cookie sheets to make clean up easier.
  • The Health Toffee Bits are usually near the chocolate chips in the grocery store.
  • Looks can be deceiving –  these cookies are really ono, so don’t be disappointed when they come out of the oven until you have taken a bite or two!

Baba Ghanouj

3 to 4 long Japanese eggplants
1 head of garlic
1/2 to 1 tsp. cumin powderEggplants
2 T. olive oil
2 T. tahini
juice of 1 large lemon or lime
4 to 5 sprigs parsley
salt to taste

Oven:  350 degrees

Cooking time:  45 minuets to 1 hour

Prep time:  15 to 20 minutes

Source:  this recipe has been adapted from a recipe submitted by Cedar Louis to an East-West Center cookbook.

While oven is heating, wash eggplants but do not peel or remove stem.  Puncture skin with a fork and place on either a greased baking sheet or coat eggplants with spray cooking oil.

Slice the tops off the garlic head, drizzle olive oil among the cloves, and loosely wrap in foil.  Put this on the pan with the eggplants for roasting.

During roasting — about 45 minutes more or less depending on the thickness of the eggplant — occasionally turn the eggplants.  Take tongs and gently squeeze the eggplant:  when they’re soft, they’re done.  Leave the garlic in the oven for 15 minutes after the eggplants have been removed or until it is soft enough to squeeze the garlic cloves from their casings.

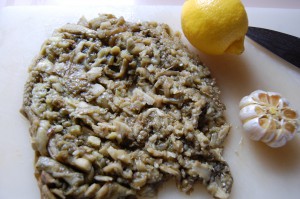
The eggplant should be cool enough to handle.  Cut off the stem portion and make an incision in the skin to open the eggplants.  Scrape out the flesh.  Once the flesh has been removed,  chop it into a pulp, squeeze the garlic cloves into the pulp, then mix these ingredients on the chopping board.

DSC_2570

Transfer the eggplant and garlic pulp to a bowl, add cumin, tahini, and the juice of one lemon or lime.  Add salt to taste.

Refrigerate and then mix in the olive oil and garnish with parsley before serving.

More:

  • The first few times I made this, I crushed raw garlic into a paste, but the taste was too strong and bitter.  I recommend roasting the garlic, and while you’re at it, roast another head or two to spread directly on crostini, French bread, crackers, whatevah.
  • Baba Ghanouj is a great dip but I also have it for breakfast — a piece of Ezekiel bread with a layer of cream cheese then a layer of BG.

Beer Can Chicken

4 to 5 pound whole chicken
Hawaiian salt and herb mix (see below)
12-ounce can of beer, any brand

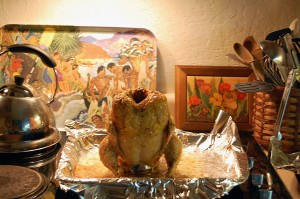
beer-can-chicken

Oven:  350 degrees
Prep time:  10 min.
Cooking time:  2 hours

Make sure your oven has the rack-to-ceiling space needed to accommodate the height of the chicken, plus an inch or so, in a pan before you start preheating. In my oven, I need to remove the highest rack.

Set oven for 350 degrees. Line pan with foil to make for easier clean up.

Remove innards of chicken.  (You could freeze these and use for gravy.)  Rinse the inside and outside of chicken with cool water and dry with paper towels.

Open the beer, place in center of foil-lined pan, and mount the chicken on the can.

This can seem challenging, perhaps even creepy, the first time you do it, but as you become more adept at this your tolerance for handling a dead headless animal increases. This point of the food preparation process would be a good time to express gratitude to the chicken for giving her life.

Make sure the chicken is stably resting on the can. You don’t want to spill the beer.

Rub the sea salt and herb mix over the chicken, including under the wings.

Make a foil tent to rest on the top of the chicken. Don’t pinch the sides to seal, don’t press foil against the chicken. Just make a tent. There’s no wind in the oven so it will stay in place.

Place the pan and chicken in the oven and set the timer for 1 hour.

At the end of the hour, remove the tent and set the timer for 1 more hour.

Let the chicken rest for about 10 – 15 minutes before carving.

Caveat:  Having a second person at this point is helpful:  one person to take a long chopstick and stick it down the hole into the beer can, while the other person, with paper-toweled hands around the chicken’s body, lifts.  But it can be done solo, by inserting the chopstick and gripping it with your teeth.

Use paper towels to take the still-hot beer can to the sink.

Since this roasting method yields a very juicy chicken, place the cutting board in a shallow pan to catch the juice.

AH, HERE’S THE RUB . . .

alaea salt

Aalea Hawaiian salt or other coarse sea salt
Whatever dry herbs you like or have handy (basil, oregano, parsley, tarragon, etc.)
Cayenne pepper (gotta have this)

I put a bunch of salt in a jar and just start sprinkling in dried herbs and cayenne and shaking it until it looks good.  I use this salt as a rub for a pork roast, too.

More:

  • When my friend tried this recipe, he told me he was disappointed that he couldn’t taste the beer.  “Well, Bob,” I said, “I don’t think you’re supposed to.”  I haven’t noticed any difference depending on the kind of canned beer used.
  • In any case, some people have made a point of debunking beer can chicken.  One of the complaints is dealing with the insertion and removal of the beer can.
  • I have never made beer can chicken on a grill or in a cooker, always in my oven.  On purpose.  For parties, I like to offer a non-grilled, non-fried protein.  Incidentally, most doctors recommend we avoid grilling and frying and go for baking, broiling, or boiling.


Hard-Boiled Egg and Avocado Sandwich

1 hard-boiled egg (sliced)
½ Avocado (sliced)
1 cherry tomato (sliced)
Spinach
2 slices of bread

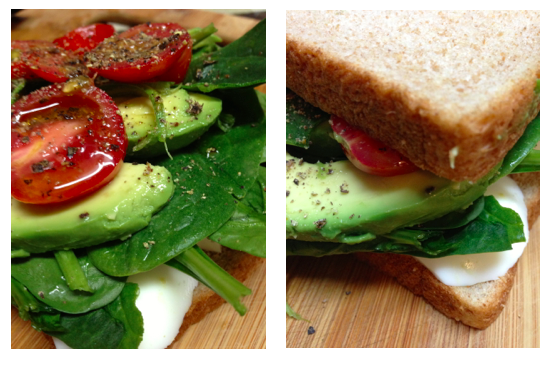
Avo Egg Sandwich

To assemble sandwich, add spinach, hard-boiled egg, sliced avocado, sliced tomato, and drizzle with olive oil. Spring salt and fresh ground black pepper

Substitutes: You can substitute mixed greens for the spinach; I like to put baby mizuna. You can find baby mizuna reasonably priced through Nalo Farms at Windward Mall Farmer’s Market. I also enjoy spicy foods so I like to add some chili infused salt to this sandwich. When I am in the mood for some tang, I add balsamic vinegar.


Guacamole

2 Ripe Avocado
1 tsp Lemon
1 clove of Garlic (minced or grated)
½ cup of Cherry tomatos
Olive Oil
Cilantro
Salt
Pepper

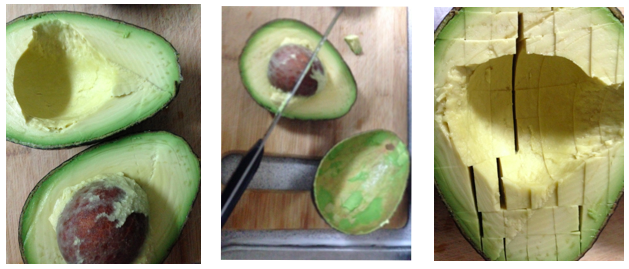
Guacamole Step One

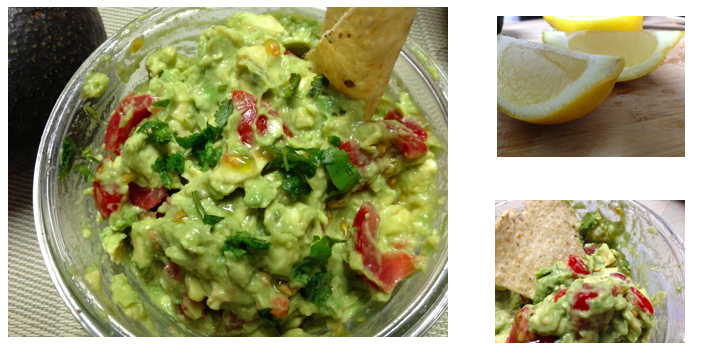
Slice the avocado in half and take out the seed. Slice the avocado in the skin and then scoop it out. Add garlic, salt, pepper and lemon juice. Mix the guacamole, leaving some of the texture of the avocado. Add diced cherry tomato. Stir. Finish with tsp of olive oil and stir

Screen Shot 2013-03-10 at 3.07.34 PM

Tips: It’s tricky to make guacamole look ono. The key is lemon or some sort of citrus to keep it from browning. Some other suggestions are adding plastic wrap to the top of the guacamole to stop if from browning and keeping the avocadoseed in the container works too.

Substitutes: Lime instead of Lemon, any type of tomato, If you like it spicy add chili or jalapenos.